텔레포트시 캐릭터의 정면 -> 뒤로 움직이는 연출을 코드로 재현한다
Starter Assets - ThirdPerson | Updates in new CharacterController package | Unity 필수에셋 | Unity Asset Store
Get the Starter Assets - ThirdPerson | Updates in new CharacterController package package from Unity Technologies and speed up your game development process. Find this & other Unity 필수에셋 options on the Unity Asset Store.
assetstore.unity.com
기본 틀은 해당 스타터팩을 사용한다
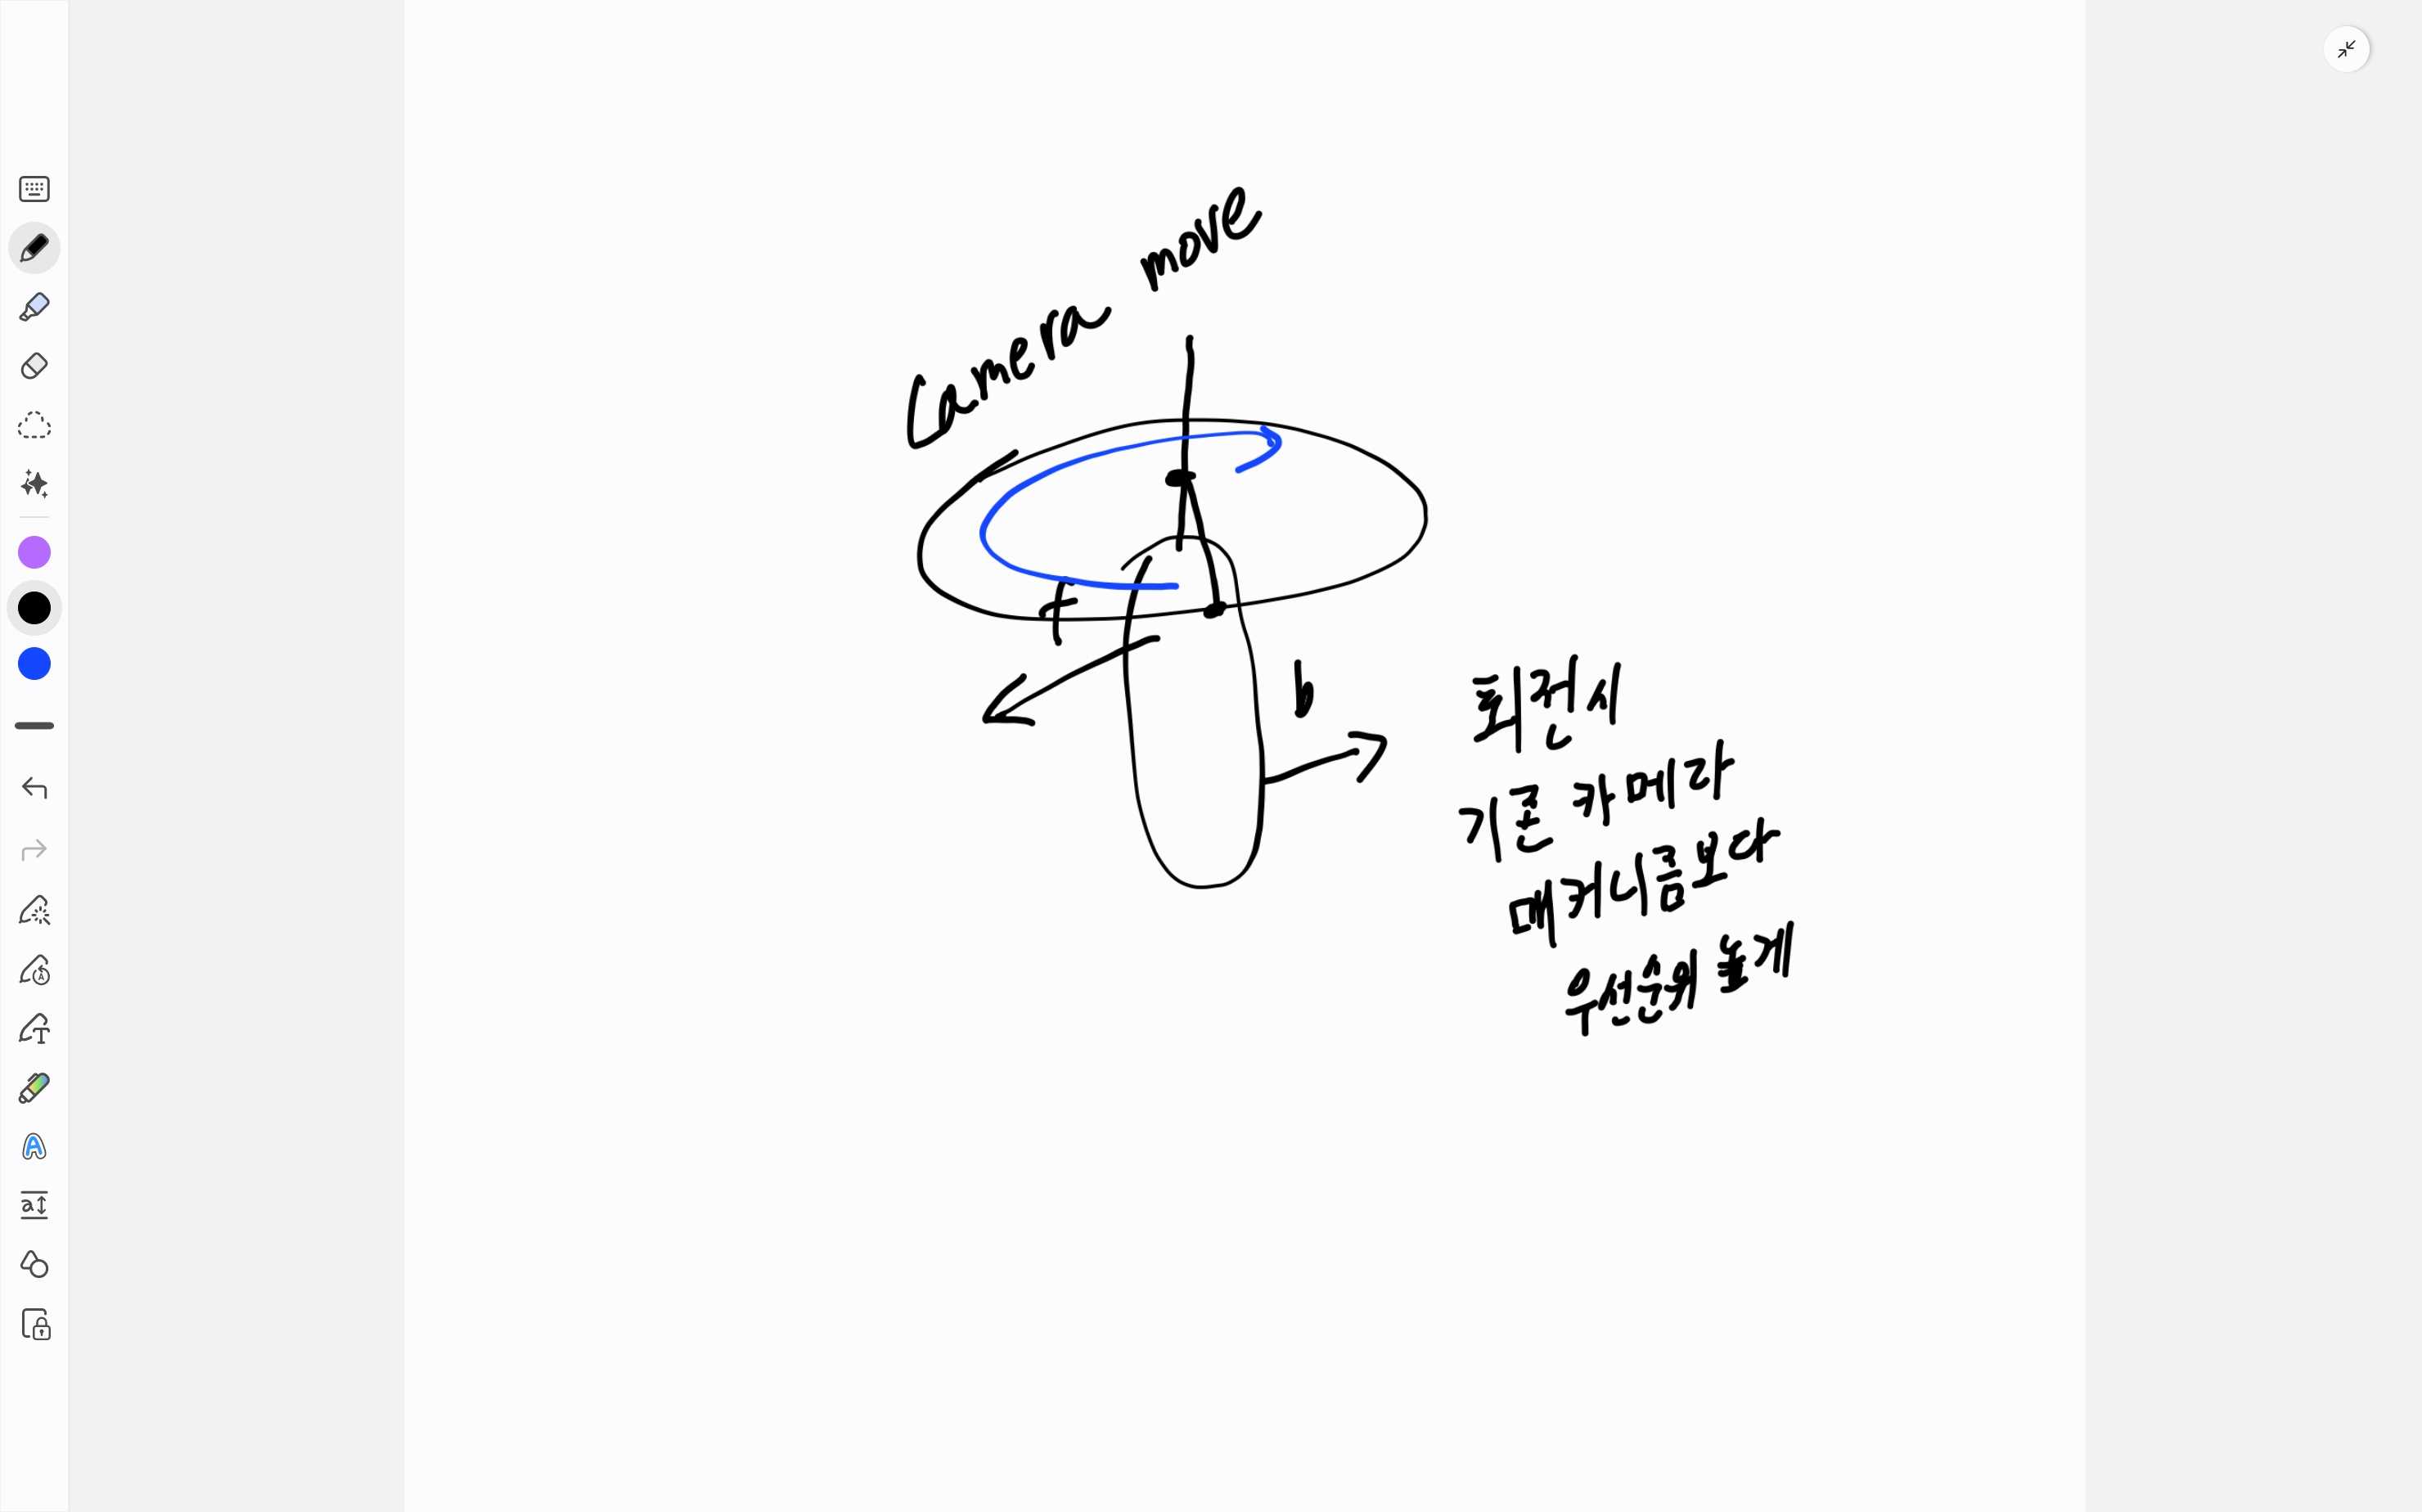
피벗을 잡아서 카메라가 어떻게 돌아갈지를 생각한다
대충 0~180도를 Y축으로 돌리면 될 것 같다
using System.Collections;
using UnityEngine;

public class CameraController : MonoBehaviour
{
    [SerializeField] private GameObject _camera;
    [SerializeField] private float _cameraMoveTime = 5f;
    private bool _isMoved = true;
    void Start()
    {
        StartCoroutine(CameraMoveTimeSet(_cameraMoveTime));
    }
    void Update()
    {
        if (_isMoved)
            _camera.transform.position = gameObject.transform.position;

        if (transform.eulerAngles.y < 180)
            transform.eulerAngles += new Vector3(0f, Time.deltaTime * 90f, 0f);
    }

    IEnumerator CameraMoveTimeSet(float time)
    {
        yield return new WaitForSeconds(time);
        _isMoved = false;
    }
}
대충 기본 구조를 짜서 테스트를 해보았다
예상대로 기본적으로 구성되어 있는 시네머신 브레인에 덮어 씌워져서 작동되지 않는다
그 와중에 카메라 pos도 잘못 잡아놔서 수정해야 한다

현재 구성인데
위 코드대로면 피벗에서 정지되어 있는 형태가 된다
이렇게 되어야 한다
using System.Collections;
using Cinemachine;
using UnityEngine;

public class CameraController : MonoBehaviour
{
    [SerializeField] private GameObject _camera;
    [SerializeField] private float _cameraMoveTime = 5f;


    [SerializeField] private CinemachineBrain cinemachineBrain;
    [SerializeField] private CinemachineVirtualCamera cinemachineVirtualCamera;
    private bool _isMoved = true;
    void Start()
    {
        StartCoroutine(CameraMoveTimeSet(_cameraMoveTime));
    }
    void Update()
    {
        if (_isMoved)
        {
            _camera.transform.position = transform.GetChild(0).transform.position;
            cinemachineBrain.enabled = false;
            cinemachineVirtualCamera.enabled = false;
        }
        else
        {
            cinemachineBrain.enabled = true;
            cinemachineVirtualCamera.enabled = true;
        }

        if (transform.eulerAngles.y < 180)
            transform.eulerAngles += new Vector3(0f, Time.deltaTime * 90f, 0f);
    }

    IEnumerator CameraMoveTimeSet(float time)
    {
        yield return new WaitForSeconds(time);
        _isMoved = false;
    }
}
대충 우선순위가 높은 컴포넌트를 잠시 끄는 방식으로 만들어 준다
그리고 여기에 카메라가 타겟을 바라보도록 코드를 추가해 준다
using System.Collections;
using Cinemachine;
using UnityEngine;

public class CameraController : MonoBehaviour
{
    [SerializeField] private GameObject _camera;
    [SerializeField] private float _cameraMoveTime = 5f;

    [SerializeField] private GameObject _target;

    [SerializeField] private CinemachineBrain cinemachineBrain;
    [SerializeField] private CinemachineVirtualCamera cinemachineVirtualCamera;
    private bool _isMoved = true;
    void Start()
    {
        StartCoroutine(CameraMoveTimeSet(_cameraMoveTime));
    }
    void Update()
    {
        if (_isMoved)
        {
            _camera.transform.position = transform.GetChild(0).transform.position;
            cinemachineBrain.enabled = false;
            cinemachineVirtualCamera.enabled = false;
            _camera.transform.LookAt(_target.transform);
        }
        else
        {
            cinemachineBrain.enabled = true;
            cinemachineVirtualCamera.enabled = true;
        }

        if (transform.eulerAngles.y < 180)
            transform.eulerAngles += new Vector3(0f, Time.deltaTime * 90f, 0f);
    }

    IEnumerator CameraMoveTimeSet(float time)
    {
        yield return new WaitForSeconds(time);
        _isMoved = false;
    }
}
대충 어떻게든 작동하는걸 볼 수 있다
해당 방식은 매우 뻣뻣하게 보일 수 있기 때문에 lerp를 사용해서 보간해주는게 좋다
그리고 lerp를 쓰면 목적지를 좀더 유동적으로 사용할 수 있게 되기 때문에 시작하기 전에, 기존의 캐릭터 뒷통수에 위치하는 위치를 잡아주면 그 위치로 움직일 수 있게 된다

이렇게 캐릭터 뒷통수에 위치하는 위치를 미리 저장해둔 뒤, 할 수 있는데....
그냥 베지에 곡선을 활용하는게 더 좋은 것 같다는 생각을 했다
이렇게 3개의 점을 정의한 뒤
시작하기 전 보조 점을 계산해준다
https://nonamed02.tistory.com/191
Unity 2D 게임 개발 - 객체 A B를 잇는 화살표 그리기
즐거운 라비닝을 들으며 개발하는 무언가 현재 덱빌딩 게임을 기획하고 있는데, 그중 카드를 끌어서 원하는 목표에 움직일시 위치를 시각적으로 보여주어야 하기에 그때 사용되는 기능이다 현
nonamed02.tistory.com
이전 글과 똑같은 연산 방식이다
이후 베지에 곡선 계산식을 함수화 시켜준 뒤
이를 반영해서 위치를 보정해 준다
using System.Collections;
using Cinemachine;
using UnityEngine;

public class CameraController : MonoBehaviour
{
    [SerializeField] private GameObject _camera;
    [SerializeField] private float _cameraMoveTime = 5f;

    [SerializeField] private GameObject _target;
    [SerializeField] private Transform _cameraEndPos;
    [SerializeField] private Transform _cameraStartPos;
    private Vector3 _supportPos;

    [SerializeField] private CinemachineBrain cinemachineBrain;
    [SerializeField] private CinemachineVirtualCamera cinemachineVirtualCamera;
    private bool _isMoved = true;

    private float _t = 0f;
    void Awake()
    {
        _supportPos = Vector3.Lerp(_cameraStartPos.position, _cameraEndPos.position, 0.5f);
        _supportPos = new Vector3(_supportPos.x + 5f, _supportPos.y, _supportPos.z);
    }
    void Update()
    {
        if (_isMoved)
        {
            cinemachineBrain.enabled = false;
            cinemachineVirtualCamera.enabled = false;
            _camera.transform.LookAt(_target.transform);

            // 베지에 곡선으로 시작점 - 카메라 위치까지 보간처리
            _t += Time.deltaTime / Mathf.Max(_cameraMoveTime, 0.0001f);
            float t = Mathf.Clamp01(_t);

            Vector3 pos = QuadBezier(
                _cameraStartPos.position,
                _supportPos,
                _cameraEndPos.position,
                t
            );
            _camera.transform.position = pos;

            if (t >= 1f)
            {
                _isMoved = false;
                if (cinemachineBrain != null) cinemachineBrain.enabled = true;
                if (cinemachineVirtualCamera != null) cinemachineVirtualCamera.enabled = true;
            }
        }
        else
        {
            cinemachineBrain.enabled = true;
            cinemachineVirtualCamera.enabled = true;
        }

    }
    private static Vector3 QuadBezier(Vector3 p0, Vector3 p1, Vector3 p2, float t)
    {
        float u = 1f - t;
        return u * u * p0 + 2f * u * t * p1 + t * t * p2;
    }
}
자연스럽게 카메라가 움직이는 것을 확인할 수 있다
다만 마지막에 위치가 튀는데, 이는 마우스의 움직임에 따라 미리 카메라 위치가 결정되어서 그렇다
해당 작용을 하는 스크립트 자체를 꺼서 해결한다
using System.Collections;
using Cinemachine;
using UnityEngine;

namespace StarterAssets
{
    public class CameraController : MonoBehaviour
    {
        [SerializeField] private GameObject _camera;
        [SerializeField] private float _cameraMoveTime = 5f;

        [SerializeField] private GameObject _target;
        [SerializeField] private Transform _cameraEndPos;
        [SerializeField] private Transform _cameraStartPos;
        private Vector3 _supportPos;

        [SerializeField] private CinemachineBrain cinemachineBrain;
        [SerializeField] private CinemachineVirtualCamera cinemachineVirtualCamera;

        [SerializeField] private ThirdPersonController thirdPersonController;
        private bool _isMoved = true;

        private float _t = 0f;
        void Awake()
        {
            _supportPos = Vector3.Lerp(_cameraStartPos.position, _cameraEndPos.position, 0.5f);
            _supportPos = new Vector3(_supportPos.x + 5f, _supportPos.y, _supportPos.z);
        }
        void Update()
        {
            if (_isMoved)
            {
                cinemachineBrain.enabled = false;
                cinemachineVirtualCamera.enabled = false;
                thirdPersonController.enabled = false;

                _camera.transform.LookAt(_target.transform);

                // 베지에 곡선으로 시작점 - 카메라 위치까지 보간처리
                _t += Time.deltaTime / Mathf.Max(_cameraMoveTime, 0.0001f);
                float t = Mathf.Clamp01(_t);

                Vector3 pos = QuadBezier(
                    _cameraStartPos.position,
                    _supportPos,
                    _cameraEndPos.position,
                    t
                );
                _camera.transform.position = pos;

                if (t >= 1f)
                {
                    _isMoved = false;
                    if (cinemachineBrain != null) cinemachineBrain.enabled = true;
                    if (cinemachineVirtualCamera != null) cinemachineVirtualCamera.enabled = true;
                }
            }
            else
            {
                cinemachineBrain.enabled = true;
                cinemachineVirtualCamera.enabled = true;
                thirdPersonController.enabled = true;
            }
        }
        private static Vector3 QuadBezier(Vector3 p0, Vector3 p1, Vector3 p2, float t)
        {
            float u = 1f - t;
            return u * u * p0 + 2f * u * t * p1 + t * t * p2;
        }
    }
}
최종 코드
'개발일지 > 게임개발' 카테고리의 다른 글
| Project DT - 적 공격 구현 (0) | 2025.09.10 |
|---|---|
| Project DT - 턴 시스템 구현하기 (1) | 2025.09.06 |
| Unity 2D 게임 개발 - 객체 A B를 잇는 화살표 그리기 (5) | 2025.08.17 |
| Unity 게임 개발 - 세이브 기능 (0) | 2025.05.05 |
| 유니티 Talk BackLogBar 개발 (0) | 2025.04.29 |


