현재 듣고있는곡
wowaka 『裏表ラバーズ』
보컬로이드 초장기 p이신 wowaka님의 작품, 아직까지 계셨다면 deco27님과 어깨를 나란히할 작품을 많이 만드셨을 것 같지만, 이루어 질 수 없는 바람이라는게 아쉽다
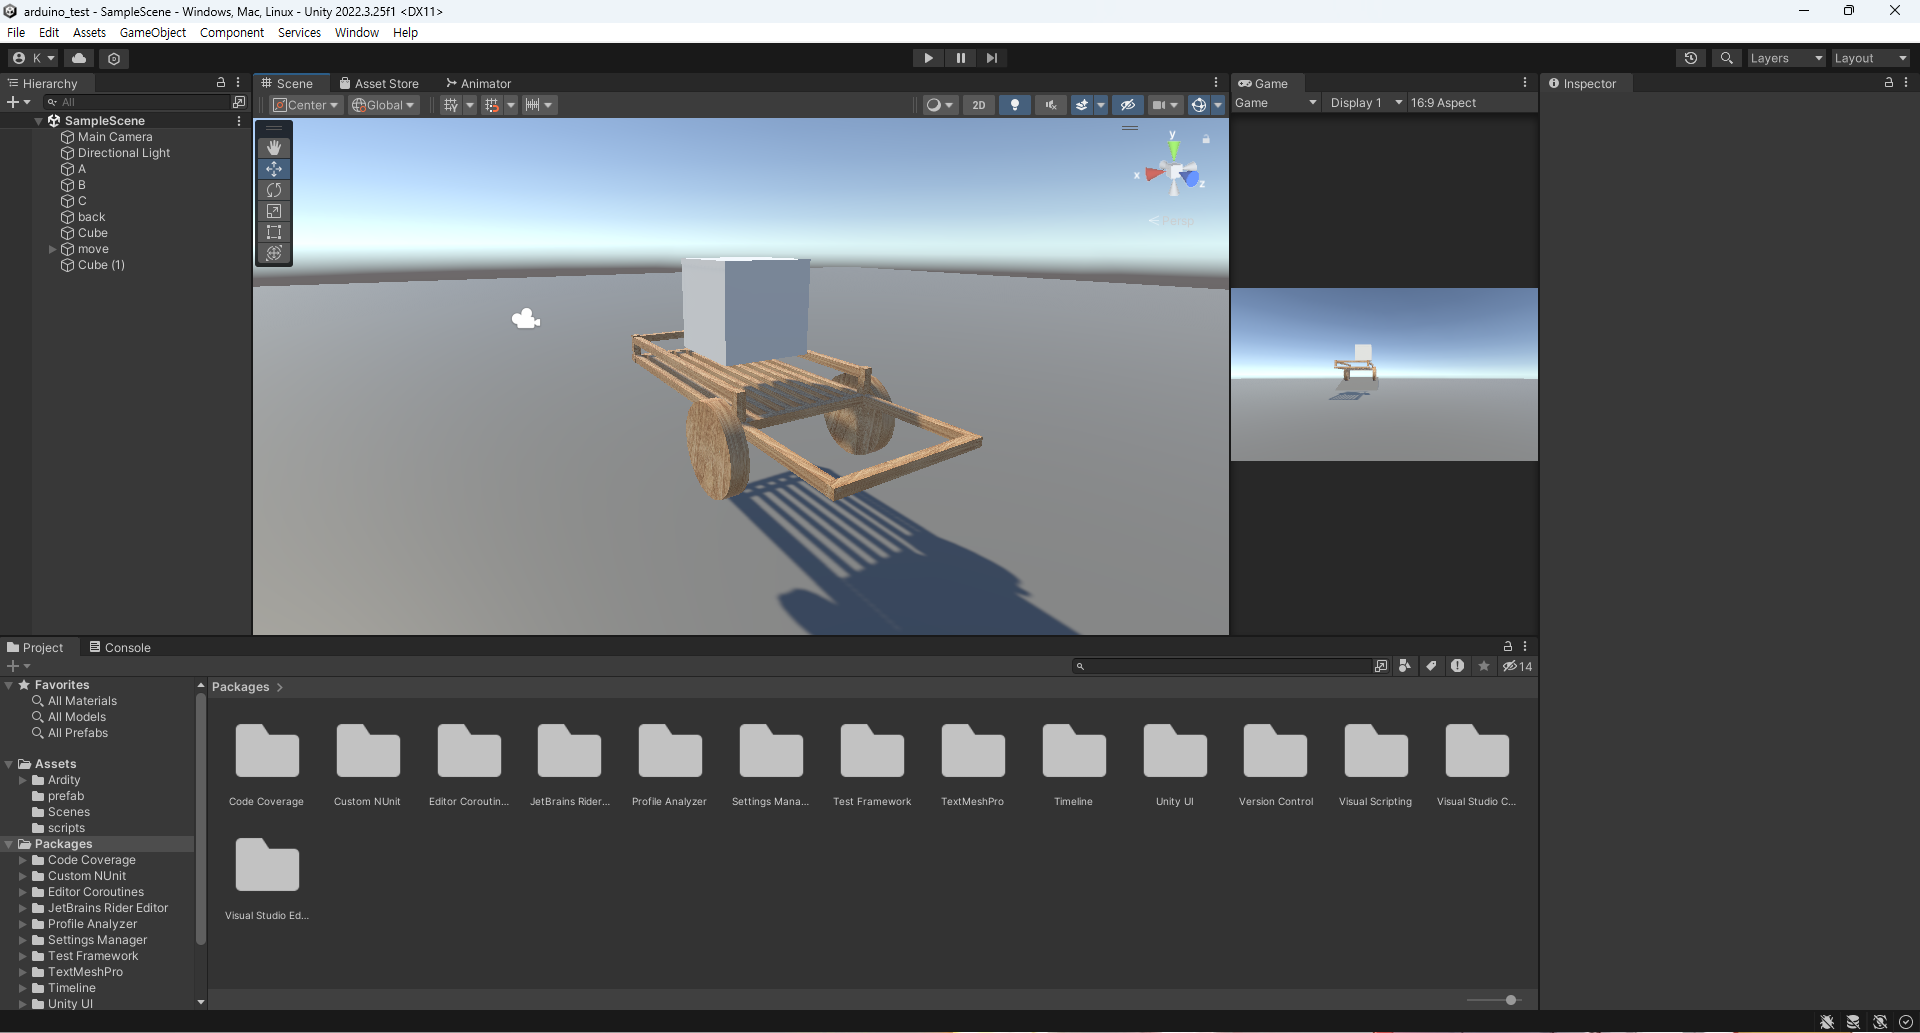
오늘은 아두이노로 이 수래를 움직여 보려 한다
// 첫 번째 MPU6050 데이터 읽기
mpu1.getMotion6(&ax1, &ay1, &az1, &gx1, &gy1, &gz1);
// 두 번째 MPU6050 데이터 읽기
mpu2.getMotion6(&ax2, &ay2, &az2, &gx2, &gy2, &gz2);
float ax1_deg = (ax1 / 16384.0) * 180.0 / PI;
float ay1_deg = (ay1 / 16384.0) * 180.0 / PI;
float az1_deg = (az1 / 16384.0) * 180.0 / PI;
float ax2_deg = (ax2 / 16384.0) * 180.0 / PI;
float ay2_deg = (ay2 / 16384.0) * 180.0 / PI;
float az2_deg = (az2 / 16384.0) * 180.0 / PI;'
아두이노는 이렇게 자신의 3축 각도를 계속해서 시리얼 모니터에 출력하고 있는 상태이다
이 값들을 유니티에서 가져오는 것이 중요하다
Ardity: Arduino + Unity over COM ports
Want to connect your Arduino to Unity over a COM port? Ardity allows bidirectional communication over COM ports from Unity®. (Previously known as: SerialCommUnity)
ardity.dwilches.com
나는 여기서 제작해둔 모듈을 적극적으로 사용하는 방향으로 결정했다
다만, 여기서 해주는 것은 그저 string으로 log를 유니티에 띄우는 것만 도와주기에 이를 활용하는 것이 중요하다
이때 사용되는 것이, string을 일정 기준으로
이렇게 자르는 것 이다
이렇게 해주면 string으로 유니티에 던져준 값을
유니티가 ,를 기준으로 잘라서 int, float등의 값으로 활용할 수 있게 된다
if (millis() > last_time + 1000) {
// 첫 번째 MPU6050 데이터 출력
Serial.print("MPU1: ");
Serial.print(ax1_deg);
Serial.print(",");
Serial.print(ay1_deg);
Serial.print(",");
Serial.println(az1_deg);
// 두 번째 MPU6050 데이터 출력
Serial.print("MPU2: ");
Serial.print(ax2_deg);
Serial.print(",");
Serial.print(ay2_deg);
Serial.print(",");
Serial.println(az2_deg);
last_time = millis();
}
현재 아두이노는 이렇게 출력하는 형태를 가지고 있다
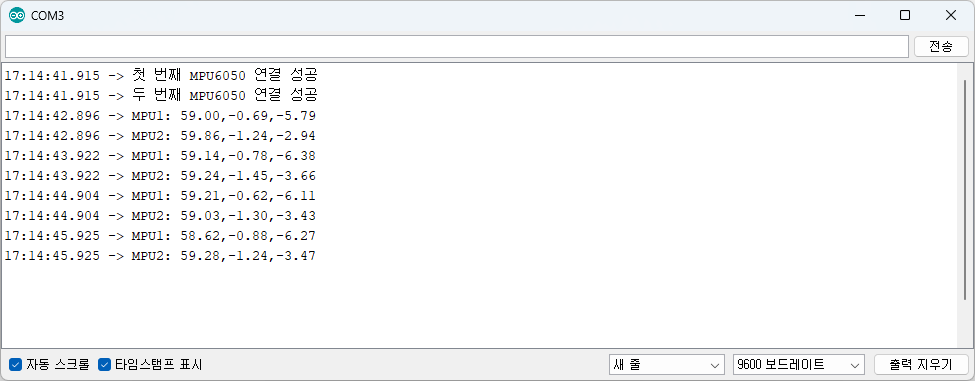
즉 이런 형태이다
이때 사용하는 값은 두 자이로 센서의 y값 밖에 사용하지 않으니 코드를 필요한 부분만 남긴다
if (millis() > last_time + 1000) {
// 첫 번째 MPU6050 데이터 출력
Serial.print(ay1_deg);
Serial.print(",");
// 두 번째 MPU6050 데이터 출력
Serial.print(ay2_deg);
Serial.print("\n");
last_time = millis();
}
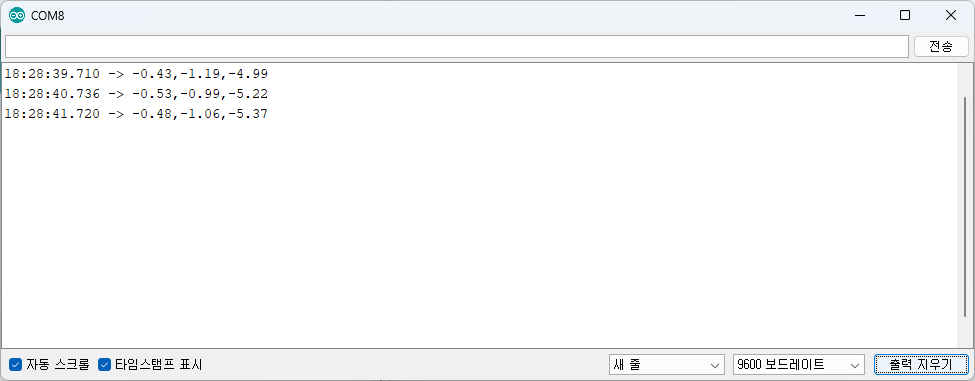
이렇게 해주면

필요한 y값만 남게 된다
이를 유니티로 써보자
시리얼 통신으로 가져온 string 값을 ,로 잘라서 Y1, Y2에 배분한다
--------------------------------------------------------------------------------------------------------------------------------
그리고 안되서 1시간 동안 뻘짓을 하다 다시 원점으로 돌아왔다
#include <Wire.h>
#include <MPU6050.h>
MPU6050 mpu(0x68); // 기본 주소
MPU6050 mpu2(0x69); // AD0 핀을 HIGH로 설정하여 주소 변경
unsigned long last_time = 0;
void setup() {
Serial.begin(9600);
Wire.begin();
mpu.initialize();
mpu2.initialize();
if (!mpu.testConnection()) {
Serial.println("MPU6050 연결 실패");
while (1);
}
Serial.println("MPU6050 연결 성공");
}
void loop() {
int16_t ax, ay, az;
int16_t gx, gy, gz;
int16_t ax1, ay1, az1, gx1, gy1, gz1;
mpu.getMotion6(&ax, &ay, &az, &gx, &gy, &gz);
mpu2.getMotion6(&ax1, &ay1, &az1, &gx1, &gy1, &gz1);
float ay_rad = ay / 16384.0;
float az_rad = az / 16384.0;
float ay_deg = ay_rad * 180.0 / PI;
float az_deg = az_rad * 180.0 / PI;
float ay1_rad = ay1 / 16384.0;
float az1_rad = az1 / 16384.0;
float ay1_deg = ay1_rad * 180.0 / PI;
float az1_deg = az1_rad * 180.0 / PI;
if (millis() > last_time + 1000) {
Serial.print(ay_deg);
Serial.print(",");
Serial.print(ay1_deg);
Serial.print(",");
Serial.println(az_deg);
last_time = millis();
}
}
다시 아두이노 부터 만들어 준다
MPU6050 2개의 기울기를 받아서 사용한다
마지막 az는 더미값이니 무시하면 된다
그러면 출력이 이렇게 나온다
앞의 2개가 2개의 자이로 센서의 기울기 값이다
그럼 저 출력을 가져와서 ,를 기준으로 3개로 잘라서 float로 저장한다

그럼 유니티에서 잘 가져오는 것을 볼 수 있다
현재는 유니티의 수래가 앞, 뒤로만 움직이고 있는데
이를 수정해 주도록 하겠다
우선 가져온 값을 읽어서 is_move의 값을 변경시킨다
이제 이 값에 맞춰서 오브젝트를 움직이고, 회전시킨다
바퀴가 2개이니 2개의 바퀴 상태, 즉 is_move의 값을 받아서 움직인다
동영상 서비스가 종료되어 해당 콘텐츠를 재생할 수 없습니다.
테스트 영상이다, 잘된다
'개발일지 > 기타' 카테고리의 다른 글
| 거리에 따라 투명도가 달라지는 물체 - 셰이더 그래프 (1) | 2024.12.23 |
|---|---|
| [QT] QT creator - 간단 작곡 코드 생성 프로그램 만들기(C++) - END (0) | 2024.05.20 |
| [QT] QT creator - 간단 작곡 코드 생성 프로그램 만들기(C++) - 5 종료 버튼, 멜로디 듣기 버튼 (1) | 2024.05.20 |
| [QT] QT creator - 간단 작곡 코드 생성 프로그램 만들기(C++) - 4 효과음, 배경음악 넣기 (1) | 2024.05.20 |
| [QT] QT creator - 간단 작곡 코드 생성 프로그램 만들기(C++) - 3 (1) | 2024.05.20 |


